Our Quadrielles get shipped regularly - either to shows or in Trunk Shows. Over time we found that due to jiggling in shipment or being handled they lost their "crisp corners" & got a bit "out-of-square." So through "trial and error" we developed a new method to make a Quadrielle hold its shape & as a result they're much more sturdy. Follow the step by step directions with accompanying photos to finish your Quadrielle. Have patience! It may take a few times before you get your interior "box" to fit "just right" but we think you'll be happy with the end result!
Items you'll need: 1/4" thick foam core (preferably acid free)
sharp box-cutter type blade or knife (to cut the foam core)
straight pins (preferably the type that will not rust)
Thin wool batting (for the outside)
Fiber fill for the top and bottom (as well as inside if desired)
Small amount of White Glue |
 |
Step 1 - Once your piece is stitched take an exact measurement of Side 1 and Side 3. Then, using the box-cutter blade cut 2 square pieces of foam core just slightly smaller than those measurements. We will refer to these as Piece #1 and Piece #2. Then cut 2 additional pieces of foam core that are the same height as Piece 1 & Piece 2 but are 1/2" narrower. We will refer to these as Piece #3 and Piece #4.
|
Alternate View Step 2
 |
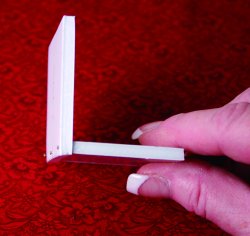
Step 2 - Hold Piece 1 and Piece 3 at a right angle to each other. Use straight pins to hold the two pieces of foam core together to form a "corner" by inserting one pin at the top, one at the bottom & one in the center. Working from the outside towards the interior & insert the straight pin through the flat side of Piece #1 & into the center core of Piece #3. You now have the first 2 sides of your "box" assembled.
|
 |
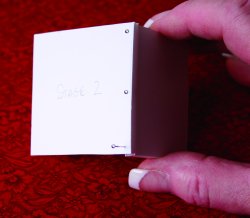
Step 3 - To assemble the third side of the "box" hold Piece #3 and Piece #2 at a right angle to each other. Use straight pins to hold the two pieces of foam core together to form the next side by inserting one pin at the top, one at the bottom & one in the center. Working from the outside towards the interior insert the straight pin through the flat side of Piece #2 & into the center core of Piece #3. You now have three sides of your "box" done! |
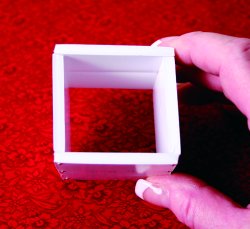 |
Step 4 - To assemble the fourth side of the "box" slide Piece #4 in between Piece #1 & Piece #2. Use straight pins to hold the pieces of foam core together forming the fourth "side" of your box. Insert three pins through Piece #1 into the core of Piece #4 & three Pins through Piece #3 into Piece #4 placing one pin at the top, one at the bottom & one in the center of each side. You now have all four sides of your "box" assembled. |
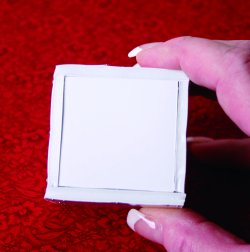 |
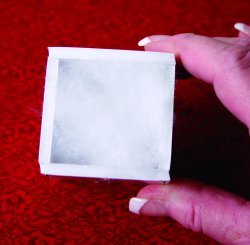
Step 5 - Take an exact measurement of the opening at the top & bottom of your box. Then, using the box-cutter blade cut 2 square pieces of foam core to match those measurements. Slide one piece into the bottom of the box. Hold the bottom piece of foam in place. Working from the outside towards the interior insert the straight pins through the flat side of each side & into the center core of the bottom piece. Use one pin at each edge & one in the center of each side so that the bottom is secure. |
 |
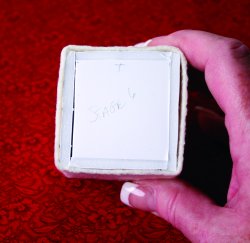
Step 6 - At this point you can fill the box with fiber fill if desired. Then, using the second square piece slide it into the top of the box. Hold the top piece of foam in place while you pin it in place in the same manner as you secured the bottom. Working from the outside towards the interior insert the straight pins through the flat side of each side & into the center core of top piece. Use one pin at each edge & one in the center of each side so that the top is secure. |
|
Step 7 - Now comes the trickiest part & you may just feel like you need an extra set of hands! Join the top four seams of your Quadrielle (T1-T8) but just before taking the final stitches at the center of the "top" (at T7 & T8) insert your hanging loop made from self-made twisted cording or ribbon. Place a small amount of fiber fill in the top "pyramid" making sure that the joining seams are crisp & well defined. |
Alternate View Step 8
 |
Step 8 - Next, measure & cut 1 long piece of wool batting which will be used to wrap around all four sides of your box. Slide the box into place in the main body of the Quadrielle to make sure it fits. Remember, you still need to add the wool batting around all four sides so if the box is slightly too big don't force it! - your side seam will not look right if you do. If the box is still slightly too big remove it & use your box cutter blade to shave a tiny bit off each side making it smaller, re-pin the sides together as you did before & try it again for size. You'll know when you have it just right! Once you're certain that your box will fit inside the main body of your Quadrielle you can wrap the Wool batting & glue it in place to add a slightly soft feel to the sides of your Quadrielle while the box inside makes it sturdy. Slide the correctly sized box wrapped in wool batting inside & whipstitch the side joining seam closed (while the box is inside). |
|
Step 9 - Finally, begin to close the bottom four joining seams (B1-B8). When you have the first three joining seams complete place a small amount of fiber fill in the bottom "pyramid" making sure to keep the joining seams crisp & well defined. Begin the final joining seam at the bottom but just before taking the last several stitches at the center of the "bottom" (at B7 & B8) add your tassel. Then complete closing the final seam. |